
How to Make a Basic Natural Moisturiser
This website may earn commissions from purchases made through links in this post.
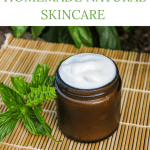
How to make your own basic homemade moisturiser.

If you look at the ingredients list on any natural moisturiser, you will see that there are two main ingredients: oil (although this may be listed as a variety of different oils and butter) and water.
Oil and water – simple right?
But the old adage is true: oil and water don’t mix.
So you need a third ingredient, an emulsifier (in our case, beeswax) to help the oil and water combine and stay that way.
In other words, this recipe is all about making mayonnaise for your skin.
Making your own moisturising lotion is quick and simple, a lot cheaper than buying natural moisturisers and a lot better for your skin than commercial moisturisers that include all sorts of suspect chemicals.
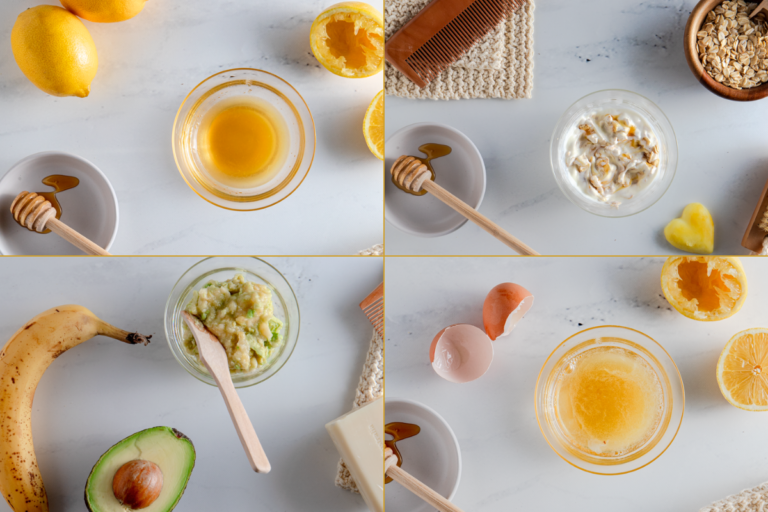
The recipe below is one to build on (although it works fine just as it is). You can change it up with different oils and butter (like cocoa butter or shea butter), and add a variety of essential oils or botanicals to add beneficial properties to your lotion.
See the article: Key Ingredients for Making your Own Natural Personal Care Products for information on where to find more specialised recipes.
Notes on the Ingredients For Homemade Moisturiser
Before you get started, check out the notes on the ingredients needed for homemade moisturiser.
Water
Water is the main ingredient in many personal care items. Moisturisers can contain between 40 – 80% water!
Tap water has sediments and chlorine and so is not the best for making personal care products unless you have a reverse osmosis water filter.
Alternatives are distilled water, which you can get from the supermarket, rainwater or floral water, which is what is left over after essential oils are distilled.
Oils
You can use any oils that you like in your moisturiser but I love macadamia nut oil because its good for your skin and I have it in the pantry.
(Macadamia nuts are after all, native to where I live.)
Jojoba Oil is another great option.
Coconut oil is solid at ‘room temperature’, which is important for a thick stable cream. You can substitute the coconut oil for any solid fats like cocoa butter or shea butter.
Beeswax
Beeswax is a natural emulsifier as well as a stiffener for your creams and lotions. It also helps seal and protects the skin.
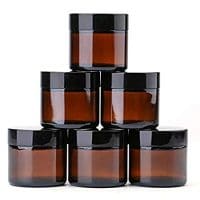
How to Sterilise Jars
There are no preservatives in homemade moisturiser, so it’s important to keep it in a sterilised jar.
To sterilise your jar, you can run it through the dishwasher on a high-temperature setting. Or you can sterilise it in the oven or microwave.
For the oven method, preheat the oven to 130°C. Wash the jar well in hot soapy water and rinse. Place the jar on an oven tray and heat for 20 minutes.
To sterilise in the microwave, wash in hot soapy water, rinse well and leave slightly wet. Microwave for 30-45 seconds. Don’t put metal lids in the microwave.
You might also like: How to DIY At-Home Facial
Homemade Natural Moisturiser

Make your own basic natural moisturiser with this simple recipe.
Materials
- 1/4 cup (50 grams) coconut oil or other solid fat like cocoa butter or shea butter
- 1/2 cup (115 grams) olive, macadamia or jojoba oil (or oil of choice)
- 2 tsp. beeswax pellets (7 grams)
- 3/8 cup (90 grams) of filtered water
Tools
- 2 x Saucepans
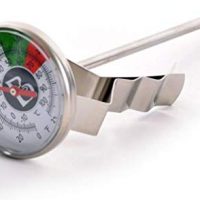
- Milk/Candy thermometer
- Stainless steel or pyrex mixing bowl
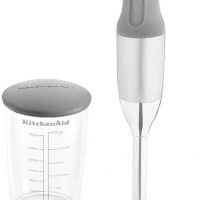
- Stick Blender
- Cosmetic jar or another sterile container
Instructions
- Bring the filtered water to the boil in a small saucepan, and let cool to about 80°C.
- Bring a second saucepan of water to the simmer. Combine the oils and the beeswax in a heat-proof bowl and place over the saucepan of hot water to melt.
- Heat the combined oils and beeswax over low heat until the wax is melted. Cool to 80°C.
- Slowly trickle the oil into the water whilst mixing with a stick blender.
- Once combined, pour into a sterile container and let cool.
- Store in the fridge.
Notes
As there are no preservatives, it's important to store your moisturiser in the fridge.
Recommended Products
As an Amazon Associate and member of other affiliate programs, I earn from qualifying purchases.
Why Store Your Lotion in the Fridge?
Have you seen those experiments where a sandwich and MacDonald’s meal are left out for a year and while the sandwich deteriorates in days, the Macca’s meal looks just like it did the day it was made thanks to all the preservatives?
That analogy works perfectly for moisturisers too.
DIY lotions are real food for your skin.
Which means, unlike commercial moisturisers you can’t keep them in the bathroom cabinet for months and years on end. They need to be made in small quantities, kept in the fridge and used within a month or two. And you need to look for signs of mould.
There are natural ingredients you can add to increase the shelf life of your products – vitamin E oil is one, grapeseed extract is another, but your lotions will still not have the same shelf-life as commercial moisturisers and really, that’s a good thing – no junk on your skin.
For those of you who make your own lotions, what’s your favourite recipe?


I like making my own body butter, but haven’t tried lotion before. I’ll definitely be giving this a go :)
what about aloe Vera, how do I use that in a a face moisturizer? We have a lot of those in our garden